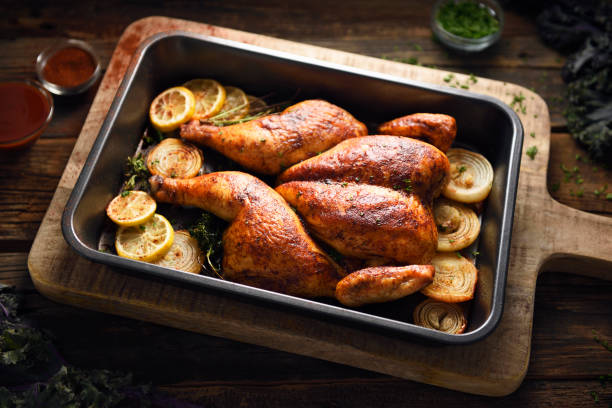
If you’re tired of the same old chicken dishes, this recipe is your ticket to a flavorful adventure.
Portuguese Chicken, known for its juicy, tender meat and rich, spicy sauce, is a crowd-pleaser that’s surprisingly easy to make at home.
I’ll guide you through each step, from marinating the chicken with the perfect blend of spices to grilling or baking it to perfection.
Whether you’re cooking for a family dinner or a special occasion, this recipe promises a delicious, satisfying meal that everyone will love.
Let’s dive into making this mouth-watering dish that’s sure to become a new favorite in your kitchen.
What is Portuguese Chicken?
Portuguese chicken, also known as “Piri Piri Chicken,” originates from Portugal.
Traditionally, it’s grilled and flavoured with a vibrant marinade that utilizes piri piri peppers, a type of chili pepper known for its heat.
This recipe offers a milder version, allowing you to adjust the spice level to your preference.
Ingredients (Serves 4)
For the Marinade:
- ¼ cup (60ml) olive oil
- 2 tablespoons (30ml) lemon juice
- 4 cloves garlic, minced
- 1 tablespoon (15ml) paprika
- 1 teaspoon (5ml) dried oregano
- 1 teaspoon (5ml) salt
- ½ teaspoon (2.5ml) black pepper
- ¼ teaspoon (1.25ml) chili flakes (optional)
For the Chicken:
- 1 whole chicken (around 1.5kg)
- 1 bay leaf
Equipment
- Baking dish
- Baking sheet
- Mixing bowl
- Basting brush
- Aluminum foil (optional)
- Sharp knife
Step-by-Step Guide
1. Prepare the Marinade
- In a mixing bowl, combine the olive oil, lemon juice, garlic, paprika, oregano, salt, black pepper, and chili flakes (if using).
- Whisk everything together until well combined. This is your marinade.
2. Marinate the Chicken
- Wash and pat the chicken dry with paper towels.
- Using a sharp knife, carefully pierce the skin of the chicken in a few places (around 5-6 times). This helps the marinade penetrate the flesh for extra flavour.
- Place the chicken in a large bowl or baking dish. Pour the marinade over the chicken, ensuring it coats all sides.
- Cover the bowl or dish with plastic wrap and refrigerate for at least 2 hours, or ideally, overnight for maximum flavour.
3. Preheat the Oven and Prepare the Baking Sheet
- Preheat your oven to 200°C (400°F).
- Line a baking sheet with aluminum foil (optional) for easier cleanup.
4. Bake the Chicken
- Remove the chicken from the marinade and place it breast-side up on the prepared baking sheet.
- Tuck the bay leaf under the chicken skin for added flavour.
- Pour any remaining marinade from the bowl or dish over the chicken.
- Bake the chicken for 1 hour, uncovered.
5. Baste and Cook Through
- After 1 hour, baste the chicken with the pan juices using a basting brush.
- Continue to bake for another 30-45 minutes, or until the chicken is cooked through and the juices run clear when you pierce the thickest part of the thigh with a knife.
- Baste the chicken with the pan juices every 10-15 minutes during this final cooking stage for an even more flavourful and crispy skin.
6. Rest and Serve
- Once cooked through, remove the chicken from the oven and let it rest for 10 minutes before carving. This allows the juices to redistribute throughout the meat, resulting in a more tender and flavourful experience.
- Carve the chicken and serve hot with your favourite sides, such as roasted vegetables, rice, or mashed potatoes. Enjoy!
Tips for Success
- Adjust the spice level: If you prefer a milder dish, omit the chili flakes or use a smaller amount. You can always add more spice later by serving hot sauce or chili flakes on the side.
- Don’t overcook the chicken: To avoid dry chicken, be mindful of the cooking time. Use a meat thermometer to check the internal temperature of the thickest part of the thigh. It should reach 74°C (165°F) for safe consumption.
- For crispier skin: Broil the chicken for a few minutes at the end of cooking (watch closely to avoid burning).
With this guide and a little practice, you’ll be whipping up delicious Portuguese chicken in no time!

