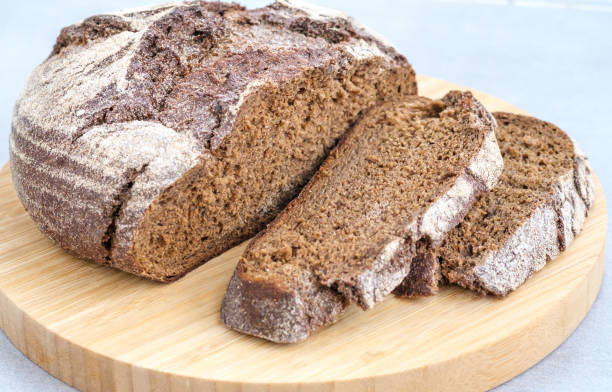
Stepping right into the kitchen can be quite a task, especially with something as seemingly complex as baking bread.
But, what if I told you making your own rye bread is not as daunting as it sounds?
That’s right, with just a few basic ingredients and some straightforward steps, you can bake a loaf that’s both delicious and satisfying.
This guide is all about breaking down the process into simple, easy-to-follow stages.
From mixing the dough to the final bake, I’ll walk you through each part, ensuring you understand every detail.
Let’s get baking!
Understanding Rye Bread
Before you go into the recipe, let’s understand what makes rye bread unique.
Rye flour is derived from rye grain and imparts a distinctively tangy flavour to the bread.
It’s often denser and darker than bread made with only wheat flour and can be a healthier option due to its high fibre content.
Ingredients
To serve about 4-6 people, you will need:
- Rye Flour: 250g (This is the core of your bread, providing the unique rye flavour.)
- Strong White Bread Flour: 250g (This helps to lighten the texture of the bread.)
- Warm Water: 300ml (The temperature should be about 37°C, comfortable to touch.)
- Instant Yeast: 7g packet (This will help your bread rise.)
- Salt: 1 tsp (Salt enhances flavour and regulates yeast activity.)
- Honey: 1 Tbsp (Honey adds a slight sweetness and helps to brown the crust.)
- Sunflower Oil: For greasing (This will prevent your bread from sticking to the pan.)
- Optional: Caraway Seeds: 1 Tbsp (For an authentic flavour twist.)
Equipment
- Large Mixing Bowl
- Wooden Spoon or Dough Hook
- Baking Tin (Preferably 900g loaf tin)
- Kitchen Scale
- Measuring Spoons
- Tea Towel or Plastic Wrap
- Wire Rack
Method
Mixing the Dough
- Combine Dry Ingredients: In your large mixing bowl, whisk together the rye flour, white bread flour, instant yeast, and salt. If you’re using caraway seeds, add them in this step.
- Add Wet Ingredients: Make a well in the centre of your dry mix and pour in the warm water and honey. Mix using a wooden spoon or a dough hook attachment on a low speed until a sticky dough forms.
- Knead the Dough: Turn the dough out onto a lightly floured surface and knead for about 10 minutes. The dough should be slightly sticky but manageable. If it’s too sticky, add a little more white bread flour.
First Rise
- Oil the Bowl: Lightly oil your mixing bowl and place the dough back into it. Cover with a damp tea towel or plastic wrap.
- Let it Rise: Leave the dough in a warm place for about 1 to 1.5 hours, or until it has doubled in size. Avoid drafts and sudden temperature changes during this time.
Shaping and Second Rise
- Prepare the Tin: Lightly oil your baking tin.
- Shape the Dough: Gently knock back the risen dough on a lightly floured surface and shape it into a loaf. Place it into your prepared tin.
- Second Rise: Cover the tin with a damp tea towel or plastic wrap and let it rise again for about 45 minutes, or until it has risen to just above the rim of the tin.
Baking
- Preheat the Oven: While your dough is having its second rise, preheat your oven to 220°C.
- Bake: Once risen, place your loaf in the centre of the oven and bake for about 30 minutes. The bread should have a dark crust and sound hollow when tapped on the bottom.
- Cooling: Remove the bread from the tin and let it cool on a wire rack before slicing.
Tips for Success
- Measuring Ingredients: Use a kitchen scale for accuracy, especially for flour and water.
- Kneading: Rye dough will feel different from pure wheat dough; it’s less elastic. Don’t be tempted to add too much flour.
- Rising Time: These times are approximate. The actual time can vary based on the temperature and humidity of your kitchen.
- Slicing: Wait until the bread is completely cool before slicing to avoid a gummy texture.
Making rye bread at home is a rewarding experience that yields delicious results.
If you follow my guide carefully, you’ll be able to create a loaf that’s perfect for sandwiches, toasting, or simply enjoying with a spread of butter.
Happy baking!

